Network Limitations:
- Ensure that a WiFi connection is enabled
- Or have it hardwired to an Ethernet Connection
- Do not edit any of the pre-existing 3rd Party DICOM Configs
1) To enter Configuration Menu, press the "Utility" key on the bottom right of the keyboard
2) On the Touch Screen, select "Connectivity"
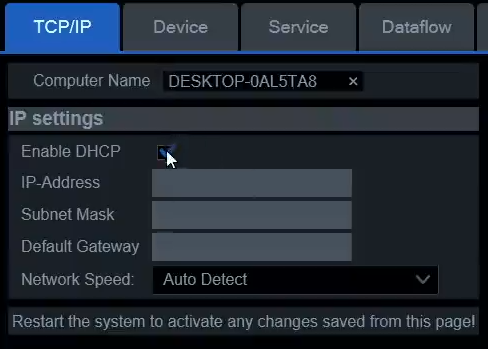
3) Under TCP/IP, "Enable DHCP" should be enabled by default
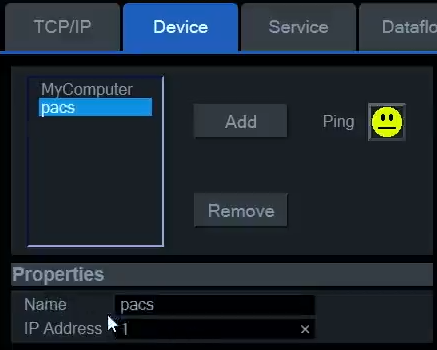
4) On the "Device" tab, Click on Add and put in:
Name: SignalPET
IP: 3.215.34.108 or 3.224.170.19
Then click on Save
5) Click on the "Service" Tab:
- Ensure the Destination Device reflects SignalPET as the name
- Choose "Dicom Image Storage"
- Click on Add
- The below page pops up. Add the following:
Name: SignalPET
AETITLE
Port Number
- No other settings needs to be changed
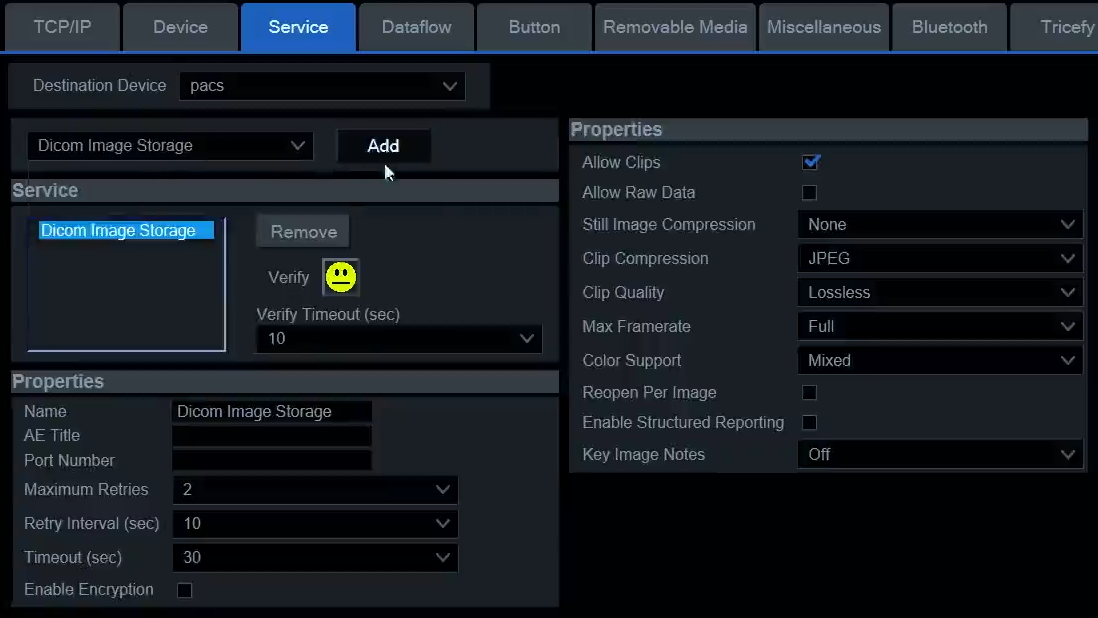
- Once the settings are in, click on Save
- Click on the Verify Face, ensure it gives you a smile! :)
6) Click on the "Dataflow" Tab
- You will see SignalPET as an option at the bottom of the drive list. Select it and click the arrows >> to move it to the "Dataflow View" list.
- Click on Save
- Click on Verify, ensure that it gives you a smiley face :)
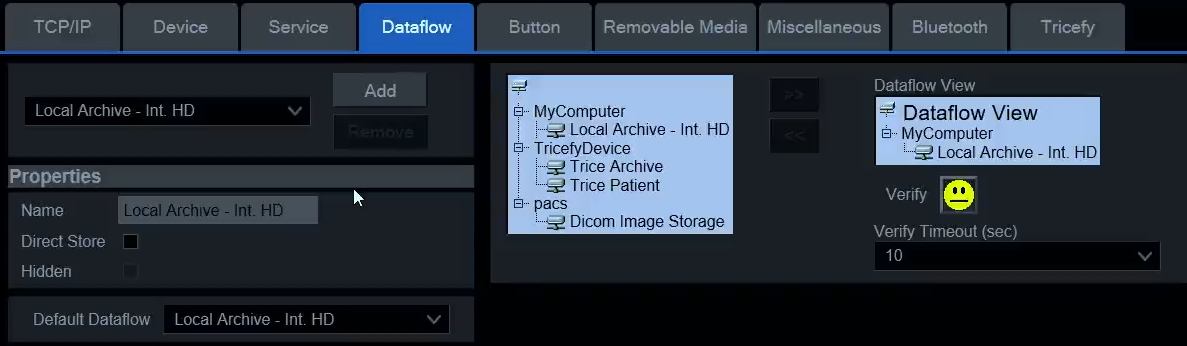
The settings are set to "Retrospective Clips" by default, meaning that the entire Ultrasound Cineloop will be transferred to SignalPET.